Guide · 3D tools
How to make a lithophane from a photo (free, nothing to install)
A lithophane is the most surprising gift a 3D printer can produce: in daylight it looks like an abstract white relief, and the moment you put a light behind it, the photo appears. Making one takes no software and no modelling skills: with hotend's lithophane generator you turn any photo into a print-ready STL, free and in your browser — the photo never leaves your device.
What a lithophane is and why it works
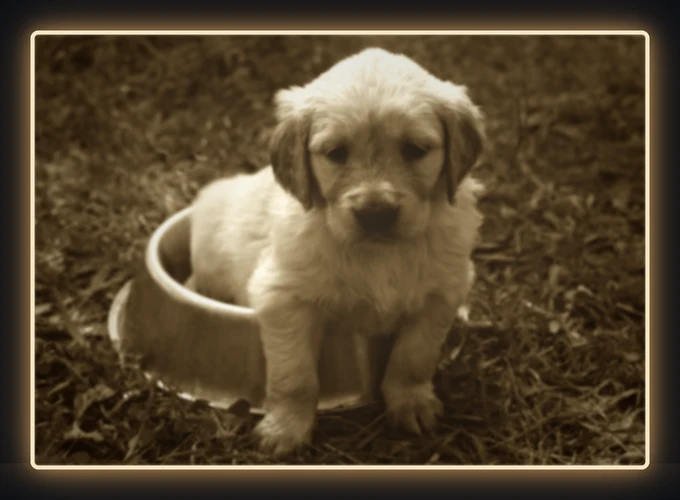
The whole trick is thickness. A lithophane is a plate where every point has a different depth depending on the photo: thin where the image is light, thick where it's dark. Under front light you only see a relief; backlit, the thin areas let light through (the highlights) and the thick ones block it (the shadows), and your eye rebuilds the photo with all its greys. It isn't a new idea either — in the 19th century they were made in porcelain. The 3D printer just put it within everyone's reach.
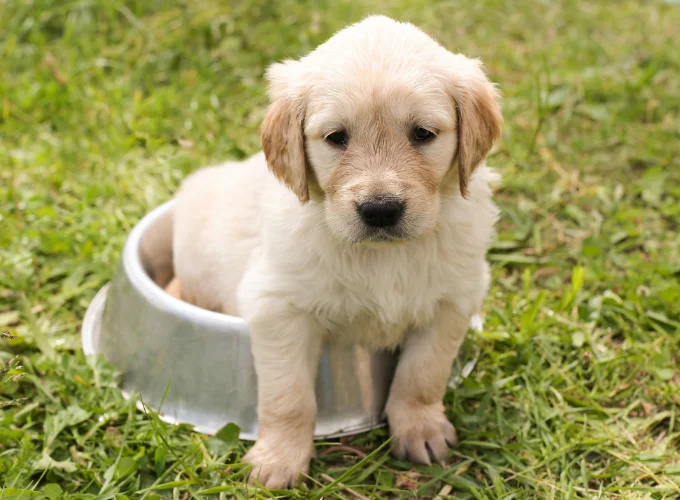 →
→ 
Step by step: from photo to STL
- Open the lithophane generator. If you'd rather see it working before using your own photo, open it with the sample photo: it loads and generates on its own.
- Drag in your photo (JPG, PNG or WEBP). High contrast with a clear subject works best: portraits, pets, silhouettes, landscapes with sky. Very dark or flat photos lose detail.
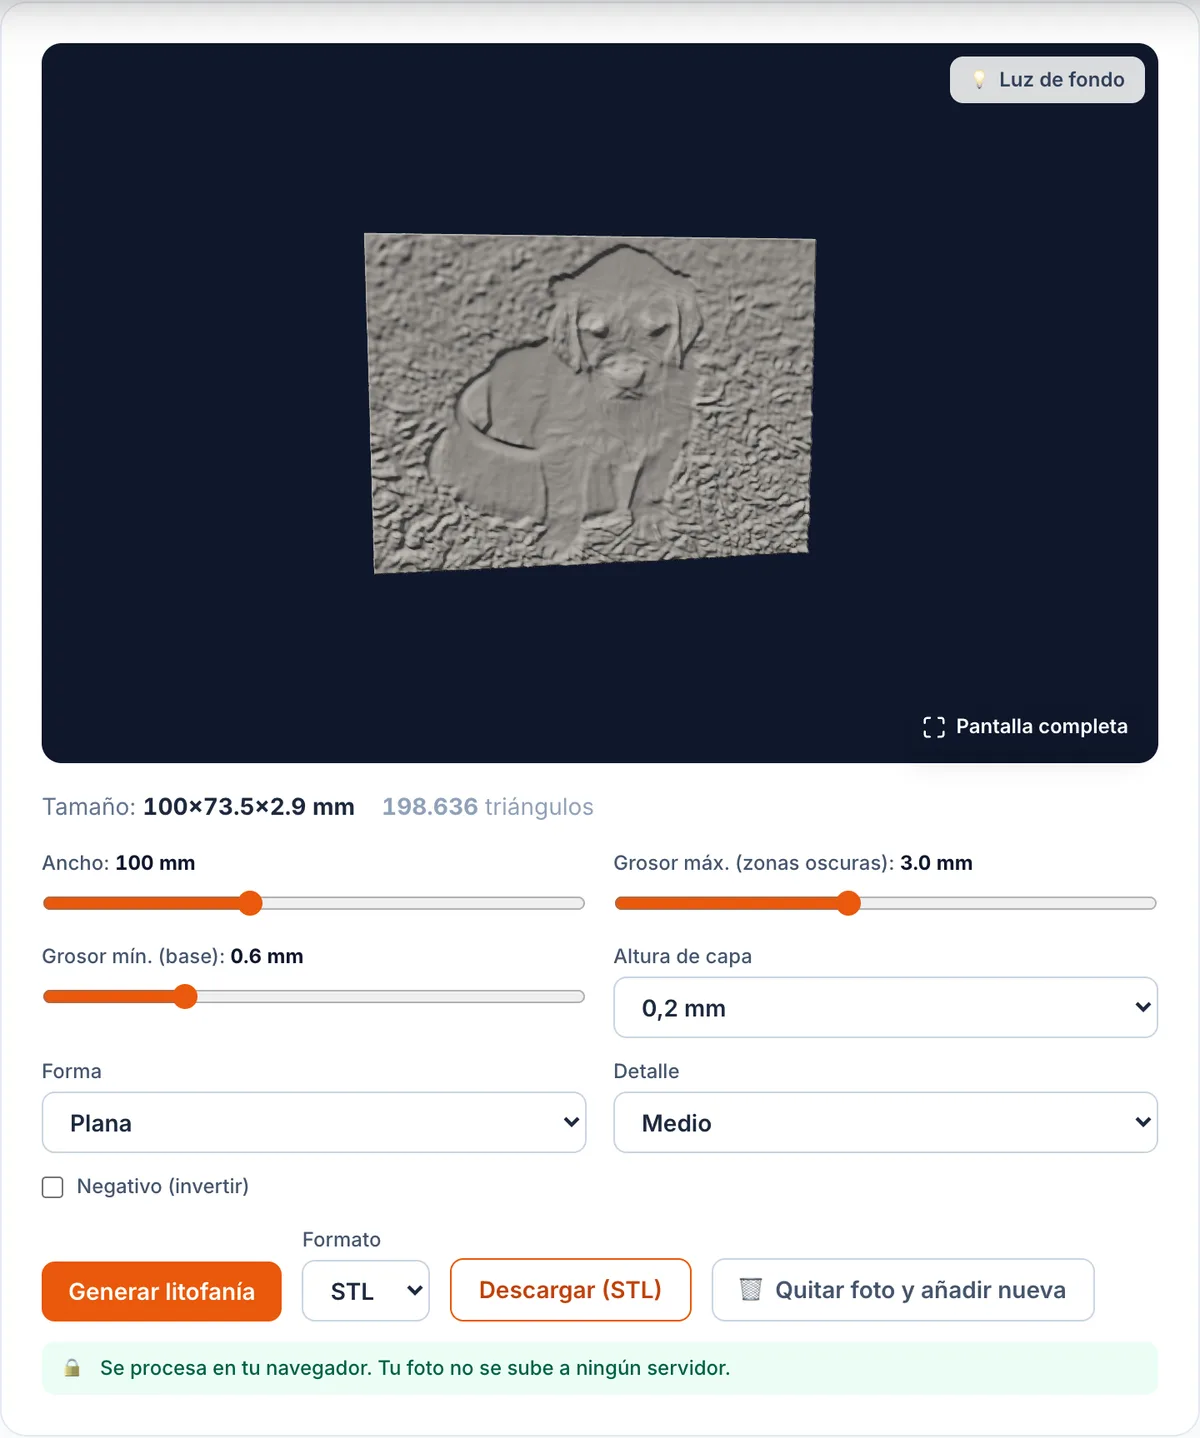
- Tune width, thickness and shape (details in the next section). If you move the sliders, press "Build lithophane" to recompute the mesh.
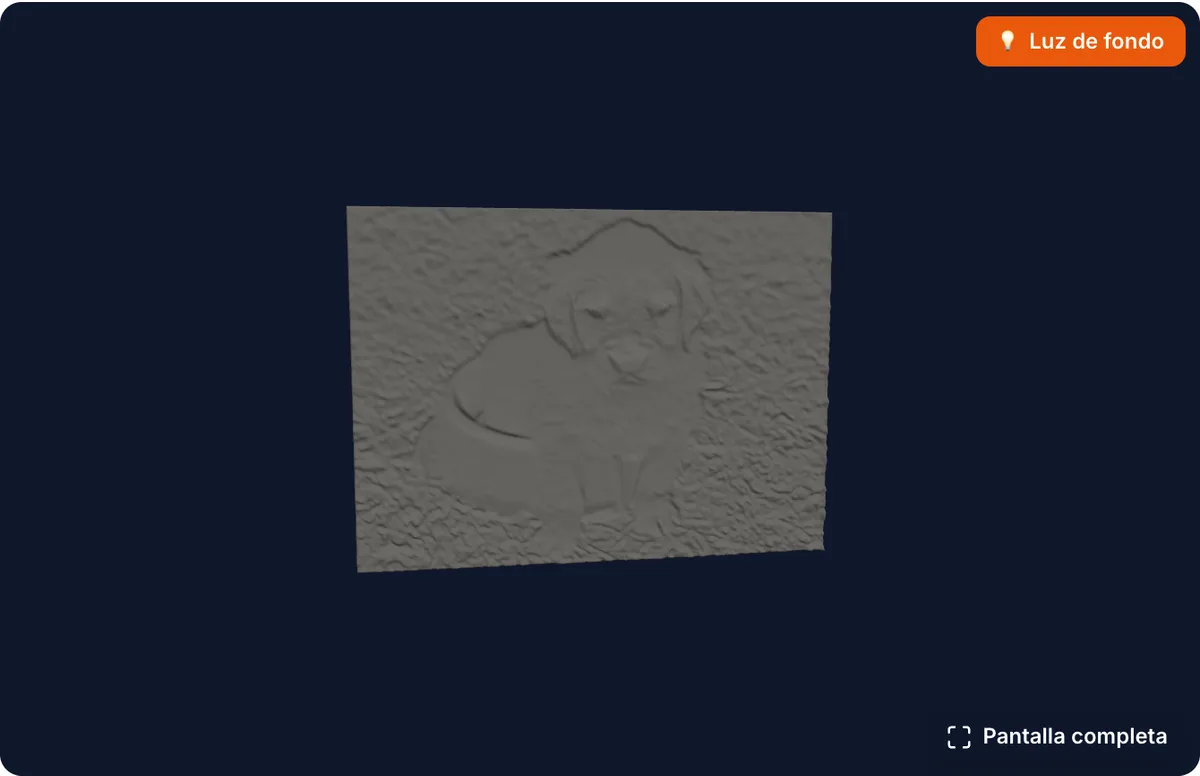
- Toggle "Backlight" in the viewer and orbit the part to check the detail against the light before spending any plastic.
- Download the STL (OBJ, 3MF or PLY work too). The mesh comes out watertight and manifold by construction, so your slicer won't complain.
The whole process runs in your browser: the photo is never uploaded to a server. For the kind of pictures that usually end up as lithophanes — family, partners, pets — that's not a small detail.
The settings that matter
- Width (40–200 mm). Height is derived from the photo's aspect ratio. 100 mm is a good frame size; check the final size in mm shown under the viewer.
- Max thickness (1.5–5 mm). The depth of the dark areas. Around 3 mm works well: thicker means more contrast, but demands a stronger light behind it.
- Layer height (0.1 / 0.15 / 0.2 / 0.28 mm). Pick the one you'll actually print with and the tool couples the min thickness (the base, 0.4–1.2 mm) so the thinnest area prints as several solid layers. You can fine-tune it by hand afterwards.
- Detail (fast / medium / fine). How much of the photo's resolution reaches the mesh. Medium is plenty for almost everything; fine produces far more triangles and takes longer. If the file comes out heavy, run it through the mesh reducer.
- Shape: flat or curved. Curved wraps the photo onto a 200° arc meant as a lampshade — and it stands upright on its own. The width you set is measured along the curve.
- Negative (invert). Swaps lights and darks. Useful for specific effects or if you want the image to read under front light on dark material.
Check it backlit before you print
The "Backlight" button in the viewer puts the light behind the panel — which is how a real lithophane is meant to be seen. Use it to decide whether the photo has enough contrast or the max thickness needs a bump, and go fullscreen to inspect small areas (faces, above all). The preview is a very good guide, but the final test is always the printed part with a light behind it.
How to print it so it actually shows
A lithophane is an easy part to print badly. These five points make the difference:
- White or natural filament. White diffuses light evenly and renders the greys; dark colours kill the effect. Plain white PLA is perfect (if you're unsure about materials, here's our PLA vs PETG vs ABS comparison).
- Print it vertically, standing on its edge. The detail gets drawn by the nozzle in the XY plane, with far more resolution than layer steps. Add a brim so it doesn't topple.
- 100% infill (or set it up as perimeters only). Any internal infill pattern shows through backlight and ruins the image.
- Fine layer height, 0.1–0.15 mm if your printer handles it well — and pick the same value in the tool so the base matches your layers.
- Moderate speed. It's a tall, thin part full of direction changes; at half speed it vibrates less and the detail comes out cleaner.
How to light it
Without a light behind it, a lithophane is a grey relief. The three classic options:
- Frame with an LED strip. The showiest option: a printed frame with an LED strip behind it gives even light and looks great on a shelf.
- Lamp. With the curved 200° shape, the lithophane IS the shade: sit it around the bulb. If you fancy building a whole lamp, Marco designed and printed one from scratch and documented the entire process.
- Window. The no-electronics version: stick it to the glass with a suction cup and daylight does the rest.
Frequently asked questions
- How thick should a lithophane be?
- Between 1.5 and 5 mm in the dark areas; around 3 mm is a good starting point. More thickness means more contrast but needs a stronger light behind it. The base (the light areas) must be thin but solid: the tool sets it automatically from your layer height so the thinnest part still prints properly.
- What's the best filament for lithophanes?
- White or natural (translucent) PLA. White diffuses light evenly and reproduces the greys; dark or very opaque colours block the light and kill the effect. No special material needed.
- Do I print it flat or standing up?
- Standing up, vertically. That way the face detail is drawn by the nozzle in the XY plane (far more resolution) instead of depending on layer steps. Add a brim so it doesn't topple, and slow the print down: it's a tall, thin part.
- Is my photo uploaded to a server?
- No. All the computing happens in your browser, on your device; the photo is never sent anywhere. That matters: most lithophanes are photos of family, partners or pets that have no business sitting on someone's server.
- Can I make a curved lithophane for a lamp?
- Yes. Pick the "Curved (lampshade)" shape and the panel wraps onto a 200° arc, designed to sit around a bulb. As a bonus it stands on its own far better than a flat plate.
Sources
- hotend lithophane generator
- Project: I designed and 3D printed a lamp from scratch
- hotend mesh reducer
- Lithophane — Wikipedia (history of the porcelain technique)